本文主要讲解《织梦后台新增多个栏目内容及前台调用方法》的详细内容
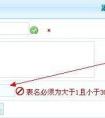
相信很多织梦建站的站长都会遇到做一下自定义的功能,比如:织梦栏目管理里面在新增一个栏目内容(如图1所示),这种情况就需要给数据库单独在新增一个字段了。接下来教大家解决方法。

第一步:给dede_arctype数据库表添加字段, 注:dede_arctype根据自己的数据库前缀自行调整。
方法一:系统设置-SQL命令行工具 ALTER TABLE `dede_arctype` ADD `content1` TEXT NOT NULL AFTER `content1` ;
方法二:phpMyAdmin给dede_arctype表新增字段
1:dede_arctype表然后选择结构,在底部选择与content之后(不填也行),点击执行。

2:新增字段,如图所示填好后,保存就行。

第二步:打开dede\catalog_edit.php,
找到:`content`='$content',(大概在54行左右)
替换成:
`content`='$content',
`content1`='$content1',
第三步:打开dede\templets\catalog_edit.htm,这一步修改很重要。
1:
function ShowItem1(){
  ShowObj('head1'); ShowObj('needset');
  HideObj('head2'); HideObj('adset');
  HideObj('head3'); HideObj('ctset');
  HideObj('head4'); HideObj('ctset1');
}

function ShowItem2(){
  ShowObj('head2'); ShowObj('adset');
  HideObj('head1'); HideObj('needset');
  HideObj('head3'); HideObj('ctset');
  HideObj('head4'); HideObj('ctset1');
}

function ShowItem3(){
  ShowObj('head3'); ShowObj('ctset');
  HideObj('head1'); HideObj('needset');
  HideObj('head2'); HideObj('adset');
  HideObj('head4'); HideObj('ctset1');
}

function ShowItem4(){
  ShowObj('head4'); ShowObj('ctset1');
  HideObj('head3'); HideObj('ctset');
  HideObj('head1'); HideObj('needset');
  HideObj('head2'); HideObj('adset');
}
|
2:

<table width="100%" border="0" cellspacing="0" id="head1" cellpadding="0">
<tr>
<td colspan="2" bgcolor="#FFFFFF" align="left">
<table border="0" cellpadding="0" cellspacing="0">
<tr>
<td width="84" height="24" align="center" background="images/itemnote1.gif"> 常规选项 </td>
<td width="84" align="center" background="images/itemnote2.gif"><a href="#" onClick="ShowItem2()"><u>高级选项</u></a> </td>
<td width="84" align="center" background="images/itemnote2.gif"><a href="#" onClick="ShowItem3()"><u>单页面内容</u></a> </td>
<td width="84" align="center" background="images/itemnote2.gif"><a href="#" onClick="ShowItem4()"><u>底部内容说明</u></a> </td>
</tr>
</table>
</td>
</tr>
</table>
<table width="100%" border="0" cellspacing="0" id="head2" cellpadding="0" style="display:none">
<tr>
<td colspan="2" bgcolor="#FFFFFF" style="text-align:left;">
<table height="24" border="0" cellpadding="0" cellspacing="0">
<tr>
<td width="84" align="center" background="images/itemnote2.gif" bgcolor="#F2F7DF"><a href="#" onClick="ShowItem1()"><u>常规选项</u></a> </td>
<td width="84" align="center" background="images/itemnote1.gif">高级选项 </td>
<td width="84" align="center" background="images/itemnote2.gif"><a href="#" onClick="ShowItem3()"><u>单页面内容</u></a> </td>
<td width="84" align="center" background="images/itemnote2.gif"><a href="#" onClick="ShowItem4()"><u>底部内容说明</u></a> </td>
</tr>
</table>
</td>
</tr>
</table>
<table width="100%" border="0" cellspacing="0" id="head3" cellpadding="0" style="display:none">
<tr>
<td colspan="2" bgcolor="#FFFFFF" style="text-align:left;">
<table height="24" border="0" cellpadding="0" cellspacing="0">
<tr>
<td width="84" align="center" background="images/itemnote2.gif" bgcolor="#F2F7DF"><a href="#" onClick="ShowItem1()"><u>常规选项</u></a> </td>
<td width="84" align="center" background="images/itemnote2.gif"><a href="#" onClick="ShowItem2()"><u>高级选项</u> </td>
<td width="84" align="center" background="images/itemnote1.gif">单页面内容 </td>
<td width="84" align="center" background="images/itemnote2.gif"><a href="#" onClick="ShowItem4()"><u>底部内容说明</u></a> </td>
</tr>
</table>
</td>
</tr>
</table>
<table width="100%" border="0" cellspacing="0" id="head4" cellpadding="0" style="display:none">
<tr>
<td colspan="2" bgcolor="#FFFFFF" style="text-align:left;">
<table height="24" border="0" cellpadding="0" cellspacing="0">
<tr>
<td width="84" align="center" background="images/itemnote2.gif" bgcolor="#F2F7DF"><a href="#" onClick="ShowItem1()"><u>常规选项</u></a> </td>
<td width="84" align="center" background="images/itemnote2.gif"><a href="#" onClick="ShowItem2()"><u>高级选项</u> </td>
<td width="84" align="center" background="images/itemnote2.gif"><a href="#" onClick="ShowItem3()"><u>单页面内容</u></a> </td>
<td width="84" align="center" background="images/itemnote2.gif">底部内容说明 </td>
</tr>
</table>
</td>
</tr>
</table>
|
3:
<table width="100%" border="0" cellspacing="0" cellpadding="0" style="border:1px solid #cfcfcf;background:#ffffff;display:none;text-align:left;" id="ctset1">
<tr>
<td height="28"> 说明:产品底部内容说明。</td>
</tr>
<tr>
<td style="padding:10px;">
<?php
GetEditor("content1",$myrow['content1'],"450","Default","print","false");
?>
</td>
</tr>
</table>
|
至此就修改好了,接下来就行前台调用了
调用标签:{dede:field.content1/}
本网刊登的文章均仅代表作者个人观点,并不代表本网立场。文中的论述和观点,敬请读者注意判断。
 微信扫一扫打赏
 支付宝扫一扫打赏


2021-02-08
2021-02-24
2021-02-08
2021-02-08
2021-02-08
2021-02-24
2021-02-08
2021-02-08

扫码加微信好友
© 2002-2022 星联科技(xinglianwangluo.com) 版权所有,并保留所有权利 老妖怪 蜀ICP备2024091751号-1
四川省广元市利州区
 川公网安备 51080202000147号